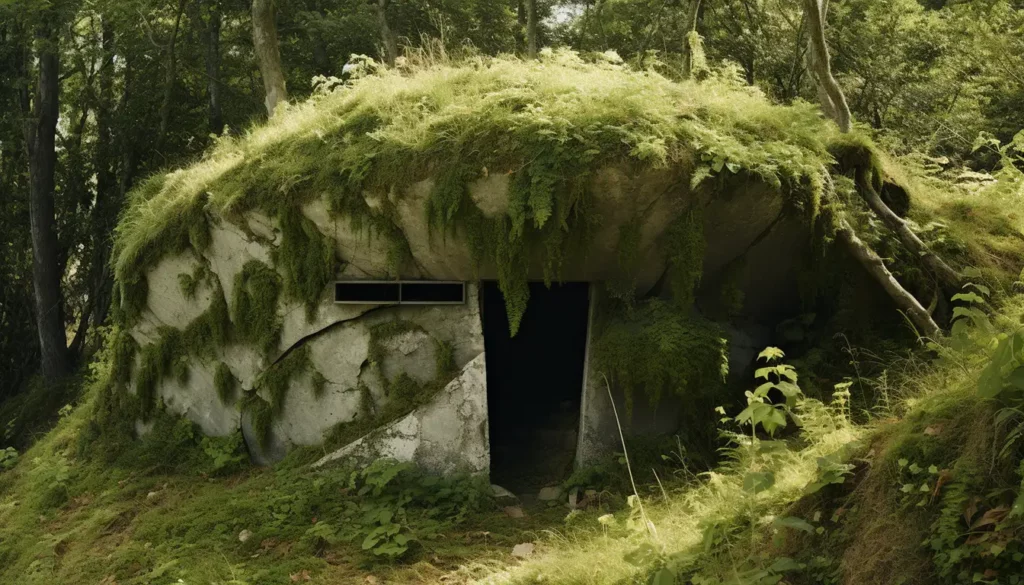
Why build a boring underground bunker when you can create a secure yet stylish storm shelter in a hill? This innovative approach offers unbeatable protection against severe weather conditions. Plus, the natural contours of the land provide a subtle and inconspicuous structure that won’t disrupt the aesthetic of your property.
Benefits don’t stop there! The earth serves as natural insulation against extreme temperatures, meaning you’ll enjoy energy-efficiency and cost savings on heating and cooling throughout the year.

Don’t miss out on the opportunity to stay close to home and keep your loved ones safe during emergencies. Take action today and explore this groundbreaking approach to storm safety.
Benefits of Building a Shelter in a Hill
Building a storm shelter in a hill has several advantages that can make it safer during severe weather events. Here are some key perks:
- Natural Protection: A hill provides extra protection from high winds and flying debris, making it an ideal spot for a storm shelter.
- Enhanced Structural Stability: Building a shelter within the hill gives better structural stability as the soil is a natural support system.
- Improved Insulation: Being embedded in the hill helps keep temperatures steady, providing better insulation and cutting energy use.
- Reduced Visual Impact: A hillside storm shelter blends into the landscape, reducing the impact on its surroundings.
- Privacy and Security: The shelter is less likely to be detected by intruders, giving added privacy and security.
- Cost-effectiveness: Utilizing natural contours of the land can save money when building, as excavating may be minimal.
Including green design principles in the shelter’s construction can use sustainable materials and practices, helping the environment and ensuring durability.

On top of these benefits, building storm shelters in hills is a well-known strategy for protecting against severe weather. For centuries, civilizations have used hillsides and caves to escape storms and other disasters. For instance, archaeological evidence shows ancient communities in Mesopotamia made underground chambers in hillsides for protection from harsh climates.
Overall, building storm shelters in hills has the benefits of practicality and environmental consciousness. It ensures safety and protection during rough weather while blending with nature. By using the power of nature itself, these shelters give peace of mind in times of chaos.
Step 1: Site Selection
Site selection is a crucial first step when building a storm bushcraft shelter. To ensure safety and effectiveness, follow these guidelines:
- Evaluate the slope: Choose a site with a gentle slope to facilitate construction and minimize soil erosion risks.
- Consider drainage: Ensure proper drainage by selecting a location that allows water to flow away from the shelter, preventing flooding.
- Assess soil stability: Conduct a thorough soil stability analysis to identify any potential issues such as loose soil or unstable rock formations.
- Check for underground utilities: Before digging, contact local utility companies to check for underground utilities such as gas lines or electrical cables in the area.
- Ensure accessibility: Select a site that is easily accessible for emergency personnel and vehicles to reach during severe weather conditions.
- Evaluate nearby hazards: Identify and assess any potential nearby hazards such as trees that could fall onto the shelter or structures that could collapse during a storm.
In addition, it is important to consider the unique details of your specific location, such as local building codes and regulations. These can vary depending on the region and should be taken into account during the site selection process.

Pro Tip: Consult with a professional engineer or architect experienced in storm shelter construction for expert guidance tailored to your specific needs and location.
Finding the perfect hill location for your storm shelter: because rolling down during a tornado definitely won’t make for a smooth ride.
Choosing the Right Hillside Location
Choosing the right hill location is key for success. It must be considered carefully.
- Firstly, the topography should be understood. Slope, height, and stability must be evaluated.
- Secondly, the area’s accessibility, transportation, and amenities should be reviewed.
- Lastly, natural elements like winds, rain, and geological conditions must be considered.
Keep in mind each hill is unique. According to a study by Berkeley, suitable drainage can prevent erosion during heavy rain. Also, the soil composition must be analyzed. Finding the perfect site means getting down and dirty!
Evaluating the Soil Composition
Analyzing soil composition takes many factors into account. These include soil texture, pH level, nutrient content, and organic matter. This lets us determine fertility and drainage. The following table gives more detail on the primary components.
| Component | Description |
|---|---|
| Soil Texture | Size of particles like sand, silt, and clay. |
| pH Level | Acidic, neutral, or alkaline, and affects nutrient availability. |
| Nutrient Content | Concentration of elements like nitrogen, phosphorus, and potassium. |
| Organic Matter | Decayed plant or animal material that adds to soil fertility. |
Apart from these, other details must be looked at. Examples are water absorption, compaction rate, and permeability. This helps us figure out how well a site can handle heavy rainfall or irrigation.

To make sure growth is optimal and avoid issues like waterlogging or nutrient deficiency, there are suggestions to implement. Like adding a subsurface drainage system with perforated pipes and gravel if drainage is poor. Or adjust pH levels – adding lime for acidic soils and sulfur for alkaline soils. And incorporating organic matter like compost or manure into low fertility soils.
By considering these, we can optimize soil composition to support construction or planting activities. Evaluating soil characteristics is essential for making informed decisions about site selection. Finding the right site is like finding a soulmate – but with less emotional trauma and more drainage.
Assessing the Drainage System
Evaluating the Drainage System is a crucial step in site selection. This assessment involves analyzing the ability to handle water flow and prevent flooding.
To ensure proper evaluation, it’s essential to consider various factors. These factors may include topography, existing infrastructure, and any nearby water sources.
By utilizing a table format, it’s easier to compare different sites. This visual representation helps make an informed decision.
Also, consider unique details specific to each site. For instance, evaluate soil permeability and historical flood data.
Pro Tip: Engage local experts or consultants who possess knowledge about regional drainage systems. This can provide invaluable insights during the assessment.
Step 2: Design and Planning

Designing and planning your storm shelter in a hill requires careful consideration and attention to detail. Here is a 3-step guide to help you in the process:
- Assess the hill: Evaluate the topography of the hill and determine the optimal location for your storm shelter. Consider factors such as stability, accessibility, and proximity to your home. Ensure that the shelter will be easily accessible in case of emergencies.
- Create a design: Develop a detailed plan for your storm shelter, taking into account its shape, size, and materials. Consider consulting with a professional architect or engineer to ensure structural integrity and compliance with local building codes. Incorporate features such as reinforced walls, a secure entryway, and ventilation systems for safety and comfort.
- Plan for emergency supplies: In addition to the shelter’s design, think about storage space for emergency supplies. Ensure that your shelter has enough room to store essential items like food, water, flashlights, and first aid kits. Consider installing shelving or designated storage areas to keep supplies organized and easily accessible.
It’s important to note that while designing and planning your storm shelter, you may encounter unique considerations based on the specific characteristics of your hill. Consulting with professionals and seeking expert advice will help you address these details effectively.
To further enhance the functionality and effectiveness of your storm shelter, consider the following suggestions:
- Incorporate natural ventilation: Install vents or windows with protective covers to allow fresh air circulation while ensuring the shelter remains secure during storms. This will help maintain air quality and prevent a feeling of suffocation.
- Reinforce structural components: Use strong construction materials and reinforce critical areas like doors, walls, and ceilings to withstand the force of high winds or falling debris. Consult with structural engineers to ensure the shelter’s durability.
By implementing these suggestions, your storm shelter will be better prepared to withstand severe weather events, providing you and your loved ones with safety and peace of mind. Remember to prioritize safety above all else during the design and planning process.
Dig deep, measure twice, survive the wrath of Mother Nature once!
Determining the Size and Dimensions

We’ll illustrate this process by creating a table. It displays aspects of size and dimensions.
- Space requirements: evaluate the area available for the project.
- Structural needs: assess the load-bearing power of materials.
- Ergonomic factors: think about human comfort and interaction.
- Aesthetic appeal: include visual elements to make it attractive.
These are just some examples. Every aspect is significant in creating a good design.
Also, take into account any specific requirements or constraints for the project. This includes budget limits or regulatory guidelines. Architectural Digest says the size and dimensions must be accurate. Even small errors can lead to major structural issues later.
Construction materials determine if your dreams come true or not. They are like Jenga towers at an earthquake convention.
Selecting the Construction Materials
Selecting construction materials involves more than looking at their advantages and disadvantages. Cost-effectiveness, environmental impact, and availability must be taken into account, too. This ensures the project meets its objectives, while respecting budget and sustainability principles.
A true example of this is a commercial building project from a few years ago. Architects studied different flooring options with precision. Taking into account foot traffic volume, visual appeal, maintenance needs and longevity; they chose polished concrete floors. Not only did it meet all functional requirements; it also offered a sleek, modern look, impressing clients and visitors. This story proves how crucial material selection is for project success.
Designing a space without proper ventilation is akin to telling someone to ‘Hold their breath’ while scuba diving.
Including Ventilation and Lighting

Ventilation and Lighting are critical components in design and planning. Fresh air and bright spaces are necessary for a comfy and practical atmosphere.
Let’s explore the importance of ventilation and lighting:
| Aspects | Ventilation | Lighting |
|---|---|---|
| Purpose | Fresh air | Illumination |
| Importance | Prevents stagnation, improves air quality | Enhances visibility |
| Considerations | Air flow and circulation | Placement of light sources |
Ventilation brings fresh air, avoiding stagnation and improving air quality. Furthermore, lighting boosts visibility and adds to the overall vibe of the area.
Apart from these, we must consider air flow direction for ventilation and appropriate placement of light sources for optimal illumination.
Don’t overlook ventilation and lighting in your design plans. If you prioritize these two elements, you can create spaces that are both attractive and beneficial in terms of productivity and well-being. So, make sure to factor them in your design process for the best results!
Step 3: Excavation and Construction
During the step of excavation and construction for building a storm shelter in a hill, follow these 6 precise steps:
- Excavate the chosen area on the hill to create a space large enough to accommodate the shelter.
- Ensure proper drainage by adding compacted gravel and perforated drainage pipes.
- Construct the walls of the shelter using reinforced concrete or other suitable materials.
- Install a sturdy roof that can withstand the pressure of the hill above.
- Provide sufficient ventilation by incorporating air vents and a ventilation fan.
- Reinforce the shelter’s structure by adding steel reinforcement bars and concrete pillars.
Additionally, ensure that all construction work is carried out under the guidance of professional engineers to meet safety standards.

Pro Tip: Consider adding a waterproofing membrane to the walls and floor of the shelter to prevent any potential water seepage during heavy rains.
Prepare for a storm while simultaneously becoming one with nature by building a storm shelter in a hill – Mother Nature’s way of saying ‘I got you covered, literally!
Clearing the Site and Marking the Design
Clearing the site is a must for any construction project. It includes prepping the area, and marking the building’s layout accurately.
- Survey site: Check existing conditions, like plants, structures, and anything that needs to be removed or shifted.
- Get permits: Before beginning, obtain all necessary permits and approvals, like environmental clearances.
- Remove trees: Hire arborists to cut and take away stumps carefully. Consider the preservation of nearby trees and wildlife habitat.
- Demolish: Engage experienced contractors to demolish existing structures while following safety regulations. Dispose of debris properly.
- Design marking: Use stakes, ropes, or spray paint to mark out the design on the ground, according to architectural plans. Keep in mind erosion and sedimentation control measures.
Sometimes during the clearing process, unique challenges crop up – like archaeological artifacts found during excavation. In such cases, archaeologists are brought in to assess and record significant findings before construction can proceed.
Take the example of a town that was undergoing revitalization. During tree removal, an ancient chamber was discovered. Archaeologists had to study this before continuing construction, all while preserving the town’s historical integrity.
Clearing sites and marking designs is a complex task that starts a successful construction project. By following these steps and being ready for surprises, contractors can have a smooth transition from site prep to excavation and building.
Excavating the Hill
Let’s kickstart the excavation process! Here’s a 5-step guide to successfully excavate the hill:

- Survey the Site: Check the topography and note any potential challenges.
- Develop a Plan: Outline the equipment, manpower, and timeline for the excavation.
- Obtain Permits: Get the necessary permits and approvals from local authorities.
- Clear Vegetation: Remove any vegetation to prepare it for excavation.
- Excavate with Care: Use skilled operators and machinery to safely remove soil and rock.
We must also consider retaining walls and erosion control measures during excavation. It’s not just about creating space, but also maintaining stability and preventing environmental damage.
Take action now! Don’t miss out on this important phase of construction that sets the foundation for future development. Join us in transforming this hill into something extraordinary by staying informed and engaged throughout the excavation process. Your help can make a difference! Digging can bring out the inner architect or archaeologist in anyone.
Reinforcing the Structure
Reinforcing the structure is an important part of excavation and construction. It’s done to strengthen the base and framework to guarantee the stability and durability of the building. Appropriate reinforcement strategies are put in place to improve structural integrity, withstand outside forces, and prevent any probable collapse or harm.
Let’s take a closer look at the essential components that help reinforce the structure:
- Materials: High-quality materials like steel bars, concrete, and reinforcement mesh are used to bolster the building’s structural elements.
- Steel Bars: Strategically placed within the frame to provide tensile strength and oppose bending or breaking under heavy loads.
- Concrete: Reinforced concrete is usually used for its ability to resist compression forces. The combination of steel bars and concrete creates a strong composite material.
- Reinforcement Mesh: Forms a lattice-like structure that reinforces concrete slabs, making sure they stay intact even under significant pressure.
By reinforcing the structure, engineers can reduce potential risks related to natural disasters like earthquakes or heavy storms. It also adds years to the life of the structure, lowering maintenance costs down the line.
Also, it is worth noting that over time, different civilizations have created innovative techniques to reinforce their structures. Ancient Romans, for example, used arches and vaulted ceilings with stone masonry techniques. This architectural wonder not only reinforced buildings but also gave them attractive appeal.
Installing Drainage Systems

Drainage systems are a must-have for construction projects. They protect against water damage and keep structures safe. The installation needs to be done properly, to ensure efficient drainage and avoid future issues.
Here’s a guide for installing drainage systems:
- Step #1: Site Assessment. Have a look around the site to find areas that might collect water. This’ll help decide where to place drains and what slope should be used for water flow.
- Step #2: Design Considerations. Work out a design plan with the type of drainage system you’ll use, for example French drains or surface drains. Think about soil type, climate conditions, and local rules too.
- Step #3: Excavation. Dig trenches for the drain pipes. The depth and width of the trenches will depend on soil conditions and pipe size.
- Step #4: Pipe Installation. Place the drain pipes in the trenches, with the right alignment and slope for efficient water flow. Connect the pipes securely with compatible fittings and sealants.
- Step #5: Backfilling. Fill the trenches around the drain pipes with materials like gravel or sand. This’ll give stability and let water enter the system easily.
- Step #6: Testing. Run water through the drainage system to make sure it works correctly. Check for leaks or blockages.
If needed, add sump pumps or catch basins for better stormwater management and runoff control, without ruining the design.
Step 4: Building the Entrance and Exit
Building the Entrance and Exit for a storm shelter embedded in a hill requires careful planning and execution. Here’s a concise guide to this crucial step:
- Locate the ideal position for the entrance and exit, ensuring easy access and protection from potential debris or hazards.
- Excavate the hill to create a secure and practical doorway, making sure to maintain the structural integrity of the shelter.
- Install a sturdy door that can withstand severe weather conditions and provide an airtight seal for maximum safety.
- Construct a reinforced tunnel or ramp leading from the shelter’s interior to the surface, ensuring stability and ease of use.
- Install a ventilation system to maintain airflow within the shelter while preventing the entry of harmful gases or particles.
- Finally, assess the entrance and exit for any potential weaknesses or vulnerabilities, reinforcing them as needed to provide optimal protection.
In addition, it’s crucial to consider factors such as drainage, accessibility for individuals with disabilities, and the possibility of emergency rescue access to ensure the entrance and exit’s effectiveness and safety.

A notable instance of a storm shelter built into a hill is the underground bunker constructed in 1951 by President Harry S. Truman near Blair House in Washington, D.C. This reinforced structure served as a safeguard against potential atomic attacks during the Cold War.
The entrance and exit points of your storm shelter should be as secure as an overprotective mother on prom night.
Designing the Entrance and Exit Points
When designing entrances and exits, every detail matters. Automatic doors, ramps, handrails, and proper lighting should be incorporated to enhance accessibility and safety.
At a conference, I saw how the entrance and exit points were strategically designed. Signage was well-placed, reducing confusion and showcasing great service.
Creating an exit plan? Remember: it’s like a break-up. Smooth and no tears!
Constructing Staircases or Ramps
Staircases and ramps are must-haves for entrances and exits. They make it easy to move between different levels or areas. Here’s what you need to know:
- Security: Adhere to building codes and guidelines for width, slope, height, etc. for staircases and ramps.
- Inclusivity: Ramps offer an accessible option for people with disabilities or using mobility aids like wheelchairs. Include handrails and non-slip surfaces for extra accessibility.
- Materials: Choose the right materials for durability and aesthetics. Staircases can be wood, concrete, or metal. Ramps can use concrete or rubberized surfaces for added traction.
- Design: Harmonize the design of staircases or ramps with the building’s architecture.
Plus, maintain them for longevity and functionality. Fun fact: According to NAHB, installing ramps in residential buildings increases accessibility and property values.
Installing Doors and Security Features

Installing doors and security features is key to protecting a building. These not only serve as access points but also as defenses against intruders or threats.
Here’s a step-by-step guide for the installation process:
- Measure and Plan: Start by measuring the size of entry and exit areas where the doors will go. This ensures you get doors that fit. Note any requirements or preferences such as door material, design, or security features.
- Select Doors: Look for doors based on your measurements and preferences. Consider factors such as durability, aesthetics, functionality, and level of security. Choose doors that match your needs for both entrance and exit points.
- Install Door Frames: Before installing the actual doors, attach sturdy door frames. Measure and mark where the frames will go. Secure them using screws or nails, making sure they’re level and aligned.
- Add Security Features: Once the frames are in place, add locks, deadbolts, peepholes, or electronic access systems. This restricts access to authorized people only.
- Test Functionality: After finishing, test each door to make sure they work. Check all security features and adjust if needed.
You can also consider automated entry systems or surveillance cameras to meet your needs. I once had a business client who needed biometric access doors with fingerprint recognition. This gave a secure environment and impressed clients. The installation was meticulous and successful.
Installing doors and security features is an investment for the building and its occupants. By following these steps and exploring options, you can make an environment safe while adding sophistication to entry and exit points.
Step 5: Finishing Touches and Safety Measures – for a safe entrance and exit!
Step 5: Finishing Touches and Safety Measures
Finishing Touches and Safety Measures are important aspects to consider when building a storm shelter in a hill. Here is a 4-step guide to help ensure the shelter is safe and secure:
- Reinforce the Structure:
- Use high-quality materials to strengthen the walls, ceiling, and floor.
- Add additional supports and reinforcements to enhance the structural integrity.
- Install Proper Ventilation:
- Ensure the shelter has sufficient ventilation to prevent a build-up of harmful gases.
- Install vents with protective covers to keep debris and water from entering.
- Include Emergency Communication:
- Set up an emergency communication system within the shelter.
- Include a two-way radio or a dedicated phone line for emergency calls.
- Stock Emergency Supplies:
- Keep essential supplies such as food, water, a first-aid kit, and flashlights.
- Regularly check and replace expired items to ensure readiness.
It is important to note that safety measures should always align with local building codes and regulations. Following these steps will help to create a safe and effective storm shelter in a hill.

One unique detail to consider is the inclusion of a battery-powered backup system for the shelter’s ventilation and communication systems. This ensures that even during power outages, the shelter remains functional and occupants can stay connected with the outside world.
True Fact: According to the National Storm Shelter Association, storm shelters built into hills are considered highly effective in protecting against severe weather conditions.
No matter how well-insulated and waterproofed your storm shelter is, it won’t matter if you accidentally lock yourself in with your in-laws during a tornado.
Adding Insulation and Waterproofing
Choose insulation based on your needs and climate. This can help regulate temperature and reduce energy use. Seal air gaps and cracks to stop drafts and moisture. This enhances energy efficiency and prevents water damage. Apply waterproof coatings or membranes to roofs, walls, and foundations. This creates a barrier against water, avoiding leaks and deterioration. Eco-friendly insulation materials are also non-toxic and sustainable, promoting healthy air quality and reducing environmental impact.
These steps play an essential role in the performance and comfort of the space. Attention to detail is a must when adding insulation and waterproofing. Regular maintenance is key to keep insulation intact and check for water damage.
For example, a residential building in a coastal area had frequent water leakage during heavy rain. The initial installation had no waterproofing, causing extensive destruction over time. After consulting experts, the entire building was insulated and waterproofed. Not only did the leaks end, but energy efficiency also improved substantially.
High-quality insulation materials and effective waterproofing techniques will save you from future issues while giving you comfortable living or working conditions.
Creating Storage Spaces
Maximize your space and stay organized! Follow these steps to create storage solutions:
- Examine your needs – assess how much space you need for items.
- Use vertical space – shelves, hooks and bins work well.
- Divide items – use containers or dividers to categorize.
- Uncover hidden spaces – think under-bed storage and wall-mounted organizers.
- Label it all – so you don’t waste time searching.
- Declutter regularly – to keep the system in check.
Have even more success with your storage by:
- Color-coding for better organization.
- Transparent containers for quick identification.
- Prioritize frequently used items for easy access.
Transform your cluttered areas into havens with these tips!
Incorporating First Aid and Emergency Supplies
It’s important to have first aid and emergency supplies in case of an unforeseen emergency. Here are 5 points to consider:
- Bandages, antiseptic wipes, adhesive tape, and pain relievers are essential.
- Flashlights, batteries, a whistle, and an emergency radio are necessary.
- A first aid manual will guide you during injuries or medical emergencies.
- Make sure your first aid kit is easily accessible and organized.
- Check expiration dates on your items and replace them when needed.
Unique details should be taken into account too. For example, any specific medical conditions or allergies need to be considered when stocking up on medicine and treatments.
A camping story highlights the importance of these supplies: we had a friend cut his hand and our well-stocked first aid kit allowed us to clean the wound, apply dressings, and avoid complications.

Accidents can happen anywhere, anytime. Be prepared with the right supplies and you’ll be ready to handle any situation efficiently. Stay safe!
Installing Communication Devices
- Identify the ideal location for your communication devices. Factors such as signal strength and access to power sources matter.
- Connect necessary cables securely. Avoid loose connections.
- Configure settings to your requirements. This could involve entering network details or adjusting audio settings.
- Test the functionality of your devices by making a sample call or sending a test message. Check if they work.
- Safety is key. Keep cables organized and away from heavy foot traffic. Inspect and maintain regularly for long-lasting performance.
- Advanced features like noise cancellation and multi-device connectivity can improve the installation process.
- Did you know that telegraphs were the first long-distance communication devices in the 19th century? Technology has come far since then, making communication devices more user-friendly.
- Follow these steps and safety measures for efficient installation and uninterrupted connectivity. Update software and firmware for optimal performance. Have fun communicating!
Conclusion
Prioritize safety and resilience when constructing a storm shelter in a hill. Use reinforced concrete walls and a solid roof to create structural integrity. Incorporate proper drainage systems and ventilation for extreme weather events. Strategically plan the location of your shelter within the hill for optimal protection. Ensure easy access with entrances and exits. Install emergency communication devices. Explore possibilities like reinforcement bars or secondary exits for extra protection. Conduct regular maintenance checks and stock up on essential supplies. Don’t underestimate preparation; it’s essential for a secure haven. Get started now – safeguard yourself before nature’s fury strikes!