Want to make an oasis in your backyard? A shelter is the ideal addition, offering protection and comfort. Whether you need a peaceful refuge or are planning for emergencies, learning how to build a shelter is worth it!
Don’t let hesitation stop you! Imagine being in nature or having a safe haven in emergencies. Plan today and Build A Shelter In Your Backyard!
Assessing the backyard for building a shelter

Building a shelter in your backyard starts with assessing the available space. Ask yourself these three key points:
- Check the terrain and soil conditions for stability and durability. Is the area prone to flooding or erosion? This could affect construction.
- Evaluate the dimensions of your backyard. Think about existing structures, sunlight exposure, privacy, and utilities.
- Research any zoning restrictions, setback requirements, or HOA guidelines that could affect the project.
Get creative! Personalize your backyard shelter with unique design elements or functional features like electricity or plumbing.
A lesson learned from a friend: He started building a garden shed without thinking about the slope of his backyard. Heavy rains caused water to build up around the foundation, damaging the shed. This is why it’s important to assess your backyard before building a shelter!
To sum up: Assess various aspects before building a shelter in your backyard. With some research and a bit of creativity, you’ll have a safe and enjoyable backyard space!
Determining the type of shelter to build
- Purpose: Figure out the primary use of the shelter. Is it for children to play in, a place to relax, or an outdoor workspace? This will help pick the right design and features.
- Climate: Check the weather in your area. If there’s heavy rain or heat, get a shelter with solid walls or adjustable ventilation. This keeps you comfortable and safe.
- Space Availability: Measure the backyard size and layout. See if you can fit a bigger gazebo or a smaller pergola.
- Plus, think about any special requirements or aesthetic preferences. You might want eco-friendly materials or decorations that blend with the landscaping.
Time to build that backyard shelter! Create a perfect oasis outside your door – relax, bond with people you love, and enjoy nature. Get going now! You’ll need more than just a shovel and a bit of desperation to build it though!
Gathering necessary materials and tools

Start your backyard shelter building process by collecting the necessaries. Make a list, research, purchase, store, and prepare for surprises.
Keep it eco-friendly and use repurposed materials – add character!
Don’t delay – embrace this opportunity with determination. Bring your vision to life while keeping yourself and loved ones safe.
Zombies? No thank you!
Rakes? Even less!
Clearing the backyard and preparing the foundation

For a solid foundation in your backyard, try these steps:
- Clear the space: Remove any rocks, debris or vegetation that could block construction.
- Mark it out: Measure and mark the area with stakes or string.
- Dig in: Excavate till you reach a stable depth for building.
- Compact soil: Use a compactor or tamper to make the soil even.
- Add drainage: Depending on your location, you may need to install a drainage system.
- Cover with gravel/sand: Spread a layer of gravel/sand on the compacted soil.
Suggestions:
- Put on protective gear.
- Get professional advice.
- Check regularly.
Follow these and you’ll create a safe shelter that will last! Just make sure, your neighbors don’t mistake it for a storage shed!
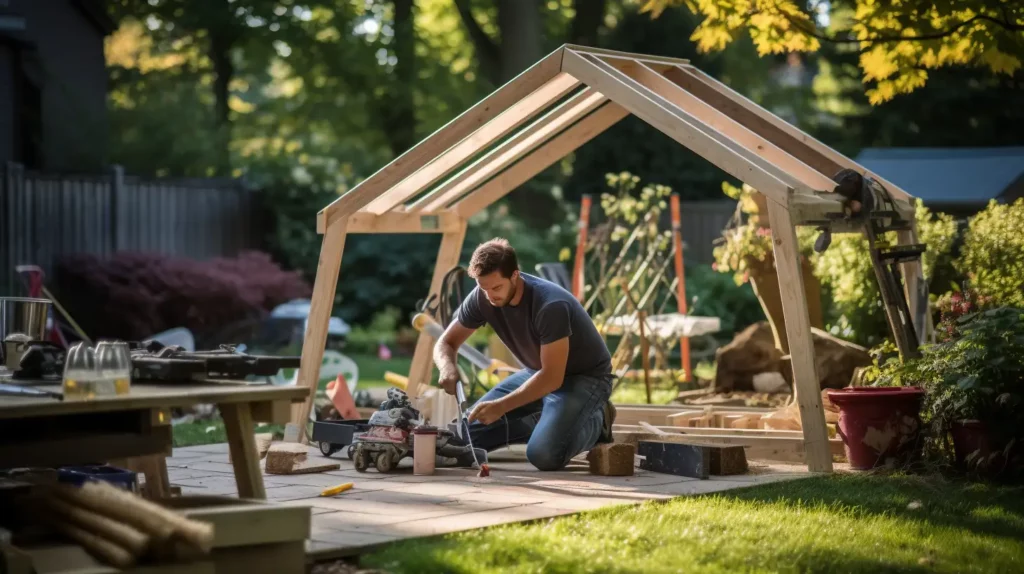
Constructing the frame and walls
- Measure and mark the dimensions of your shelter on the ground. Use stakes and string to make it level and square.
- Dig holes for the corner posts and fill them with concrete.
- Add posts along the sides of the shelter. Space them evenly and use a level.
- Attach horizontal beams or headers to the tops of posts. This creates a strong framework.
- Add plywood sheets or other materials to form the walls. Secure tightly for protection.
- For materials, use treated lumber or weather-resistant alternatives.
- Apply waterproof sealant or paint on all exposed wood.
- Add insulation between wall studs for temperature control.
- Install windows or vents for air circulation.
- Create a cozy backyard shelter for storage, relaxation, or workspace. Perfect for any weather, even an apocalypse!
Roofing and insulation

Roofing and insulation elements are key for any backyard shelter. Consider material, durability, weather resistance, and installation. Metal roofs are long-lasting and weatherproof. Shingles provide a classic look. Fiberglass insulation prevents heat transfer and foam insulation offers good moisture resistance.
In the past, civilizations used natural materials like thatch and animal skins. Technology has since advanced, creating more durable and efficient roofing and insulation materials.
By considering these aspects, your backyard shelter can be comfortable and long-lasting. Plus, you don’t need an HGTV crew for the doors and windows!
Adding doors and windows
Ensure proper placement – Strategically position doors and windows for maximum light and air flow. This will make your shelter more inviting and comfortable.
Choose suitable materials – Go for durable stuff that can handle different weather conditions. Pick windows with good insulation to keep the temperature steady.
Add security measures – Fit sturdy locks on doors and reinforced glass on windows to make your backyard shelter more secure.
For extra uniqueness, you can get custom-made stained glass windows and creatively designed doors that match your shelter’s theme.
Install skylights – These can boost natural light, reduce energy consumption, and make your shelter brighter and livelier.
Sliding doors can save space while giving easy access in and out.
By being mindful of placement, materials, security measures, and adding unique elements, you can turn your backyard shelter into a practical yet beautiful spot for relaxation and fun. Plus, add a mini fridge and you’ll be set for the ultimate hideout – now all you need is to learn how to live without natural light and social interaction.
Finishing touches and additional features

Lighting: Put in suitable lighting fixtures to make the atmosphere pleasant and ensure you can see in the evening.
- Furnishings: Get furniture that’s comfy and long-lasting, to make your shelter a cozy spot to unwind.
- Greenery: Add plants and flowers to bring life and give a fresh atmosphere.
- Privacy: Use curtains/blinds for privacy when you want it.
- Entertainment: Think about having speakers or a TV for leisure.
- Storage solutions: Include storage options to keep your stuff organised.
Plus, you can give your backyard shelter special touches that suit your taste. Put in floor cushions for extra seating, or install mini-fridges for ease. The possibilities are limitless when it comes to expressing your style.
Did you know? BHG says adding a fireplace or fire pit can make your backyard shelter warm even in winter.
Even if your backyard shelter is a flop, you have a great reason to have a ‘the world is ending’ party.
Conclusion
Now that you’ve got the know-how to build a shelter in your backyard, it’s time to get practicing! As they say, “Practice makes perfect“. The more you work on constructing shelters, the better you’ll get. Plus, each shelter has its own unique set of challenges and solutions. You might even find new materials and techniques to use.
Building shelters isn’t just practical; it’s an opportunity to find passion and cultivate creativity. So embrace the chance to make your outdoor space an oasis of innovation.