Storms can be dangerous. To be safe, it’s important to have a storm shelter. Here, we will look at building one in your closet.
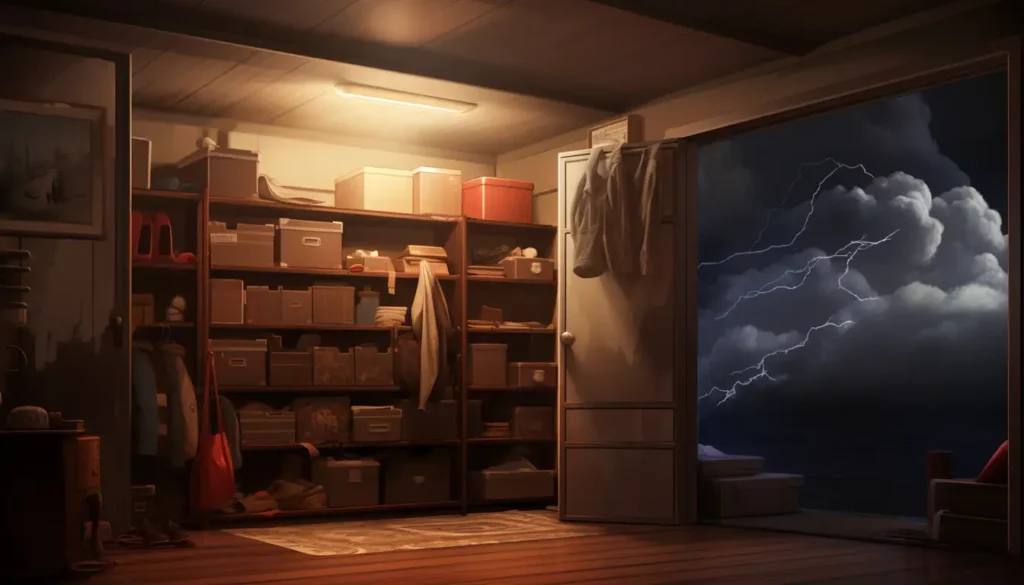
Size and location of the closet should be considered. The area should be enclosed and strong enough to withstand a storm. It should also have proper ventilation and access to electricity and plumbing.
Materials like steel doors, concrete blocks, and shelves are needed. It’s best to get advice from experts who know about the requirements for your area.
Having storm shelters in closets isn’t new. People have been using them for protection throughout history. Homeowners now take steps to keep safe from natural disasters. Security is a big part of our lives.
Benefits of Having a Storm Shelter in Your Closet

Having a storm shelter in your closet has lots of pros! These include:
- Protection against tornadoes & hurricanes – you’re safe from wind & flying debris.
- Convenience & accessibility – no need to go outside during an emergency.
- Privacy & comfort – familiar surroundings ensure security.
- Fewer evacuation worries – you can quickly get shelter at home.
- Potential insurance benefits – some companies offer discounts.
- Multifunctional – use the space for storage when not needed for storms.
When building a storm shelter, consider ventilation & reinforcing the structure. Jane had a firsthand experience – a powerful tornado hit, but her family was safe in their newly built storm shelter in the closet.
A tornado or storm shelter has plenty of advantages – protection, convenience, privacy, potential insurance savings, multifunctional use… and peace of mind during uncertain times.
Assessing the Feasibility and Safety of Building a Tornado Shelter
Building a storm shelter within your closet involves evaluating its feasibility and ensuring its safety. Consider the following points:
- Assess the structural integrity: Determine if your closet can support the installation of a storm shelter without compromising its stability.
- Evaluate ventilation and airflow: Adequate ventilation is crucial to prevent suffocation inside the shelter. Assess if your closet can provide sufficient airflow.
- Conduct a safety assessment: Ensure the shelter meets safety standards and is capable of withstanding the impact of severe storms.
From the safety assessment to assessing your closet’s structural integrity, numerous unique details should be considered to guarantee protection. Remember to address crucial factors such as ventilation, materials used, and the overall integrity of the shelter.

In a similar context, a story is worth mentioning. Jane, residing in an area prone to tornadoes, transformed her wardrobe into a storm shelter. Her careful evaluation of structural reinforcements and ventilation systems proved lifesaving during a recent storm.
If your closet collapses on top of you, at least you won’t have to worry about organizing your clothes anymore.
Checking the Structural Integrity of Your Safe Room
Before you make your closet a storm shelter, it’s important to check its structural integrity. Here’s a guide:
- Look for cracks, bulges, or water damage on the walls.
- Make sure the flooring is stable and there’s no rot or bug infestation.
- Check the ceiling for sagging or leaks.
- See if the door is strong enough to handle high winds and impacts.
- Check that the ventilation system is working properly.
- Ensure there are no electrical hazards.
You should also consider its location. Is it close to exterior walls or windows? This can help you decide if it’s a good spot for a storm shelter.
In 2013, a family in Oklahoma was saved from a tornado by their walk-in closet. It was well-constructed and able to resist the strong winds.
To stay safe, always remember that assessing a closet’s structural integrity is key! Oh, and if you’re near the bathroom, you can multitask with a storm shelter and a pee break.

Assessing the Suitability of Your Closets Location
When selecting a closet to use as a storm shelter, there are important elements to consider. Size is key – it must fit everyone in the household. Structure, proximity to walls and accessibility should also be taken into account. Make sure it is not blocked by furniture, has good ventilation and insulation.
The closet should also provide protection from debris and falling objects. Locate it away from windows and exterior walls.
A poignant example of this happened to one family. During a thunderstorm, they went into their walk-in closet, only for debris from a nearby tree to break through the glass window by the closet, injuring some family members.
It’s vital to evaluate the closet’s location properly when it comes to protecting yourself. Consider size, structure, accessibility, protection from hazards and ventilation, to make sure you have a safe haven when the weather turns.
Required Materials and Tools
The construction of this kind of diy shelters require materials and tools. Here’s the must-have list:

Materials:
- Concrete blocks
- Reinforcing steel bars
- Plywood sheets
- Waterproof sealant
- Construction adhesive
- Heavy-duty hinges and bolts
Tools:
- Screwdriver and screws
- Hammer and nails
- Drill with bits
- Measuring tape
- Level
- Utility knife
Be careful when selecting materials as they will affect the shelter’s strength and durability. Specialized tools like a reciprocating saw or sledgehammer may be needed. To add extra stability, consider reinforcing the walls with steel bars (professional help might be required).
A family in Oklahoma had a walk-in closet they converted into a storm shelter. With planning and execution, they created a safe haven within their home. They now have peace of mind during storms – and the investment in time and effort is worth it.
Create a panic room from your clothes space and be ready for any tornado!
Step-by-Step Guide on Building a closet Storm Shelter

A professional guide outlining the process of constructing a storm shelter within your closet is presented. The following steps provide a concise and practical approach to building a storm shelter:
- Assess the dimensions and structural integrity of your closet.
- Choose the appropriate materials for reinforcement.
- Design and construct a reinforced shelter within the closet.
- Install emergency supplies and equipment.
- Ensure proper ventilation and safety precautions.
Furthermore, it is essential to consider unique details that have not been covered yet. This can include assessing the proximity to the home’s foundation, reinforcing entry points, and seeking professional guidance for stability analysis.
In light of storm shelter construction, it is interesting to note that the National Storm Shelter Association (NSSA) provides guidelines and certifications for safe and effective storm shelter construction.
If you’ve been hoarding clothes for the apocalypse, here’s your chance to put those holey sweaters to good use.
Clearing out the Closet and Preparing the Space
Want to get ready for a storm? Clear out your closet! Here are three easy steps:
- Remove everything from your closet – clothes, shoes, accessories – and make room for building materials.
- Clean the closet, getting rid of dust and debris. Use mild products to keep it safe.
- Check the walls and flooring for damage. Make sure everything is stable before getting started.
Once you’ve done that, you can start constructing your storm shelter. Don’t wait; get your closet ready now for maximum security later!
Reinforcing the Closet Walls and Ceiling

- Place steel brackets in each corner of the closet walls.
- Secure 2×4 wooden beams horizontally around the walls using screws.
- For reinforcement, add more beams perpendicular to the existing ones.
- Make sure all fasteners are tight.
- Use construction adhesive for extra strength.
- Hire a contractor who specializes in storm shelter construction for expert help.
Pro Tip: Ensure good ventilation for your closet storm shelter. Poor ventilation can make it a breeding ground for unwanted things.
Installing Proper Ventilation
Want to make sure your storm shelter is safe? Follow these steps:
- Install a ventilation fan near the ceiling for air circulation.
- Add adjustable vents on opposite walls for cross-ventilation.
- Incorporate windows or skylights for natural airflow and daylight.
- Consider an air exchange system like an HRV or ERV.
- Seal all openings with durable materials.
- Inspect and maintain regularly.
FEMA says poor ventilation leads to low oxygen levels and health risks. So, be the architect of your own safety and build a storm shelter that’s strong enough for storms and family critiques!
Building a Supportive Framework

Construct walls with reinforced concrete or steel panels for strength and longevity. Put in a strong door with multiple locks to secure against storms.
Ventilation systems with filters will stop hazardous gases and sustain air quality. Anchor the foundation by setting it deep in the ground or using strong bolts.
Make sure that all components, such as columns and beams, are engineered to endure high winds and debris.
Also, pay attention to special details to make a dependable frame. Every shelter should be adjusted based on local elements like soil conditions, utility access, and water infiltration risks.
Did you know? According to FEMA, having a storm shelter increases your chances of surviving a tornado or terrible storm. Make your closet storm shelter extra special by adding a unique door. It’ll show your guests you’re a true party host!
Adding a Specially Designed Door
Here’s a 5-step guide to help:
- Measure the dimensions. Get accurate measurements of the height and width of your closet opening.
- Choose the right door material. Go for materials like reinforced steel or solid wood that can withstand extreme weather.
- Reinforce the door. Add heavy-duty hinges, deadbolts, or sliding bolts for extra security.
- Seal any gaps. Use weatherstripping or caulking to prevent air or water leakage.
- Test the functionality. Open and close the door multiple times to ensure smooth operation.
Consult local building codes and regulations too!

Plus, did you know John Jordan Crittenden, an American politician, had an intricately crafted wooden storm door built in his own home in the early 19th century?
Panic-buy toilet paper or panic-build a storm shelter!
Securing the Shelter with Emergency Supplies
Stock up on non-perishables, such as canned goods, granola bars and dried fruit. They provide essential nutrients and can be stored long-term. Have enough drinking water for at least 3 days – 1 gallon per person per day. Plus, get water purification tablets.
Create a first aid kit with bandages, antiseptic ointment, pain relievers, and prescriptions. Collect batteries, flashlights and a hand-crank or battery-operated radio. Essential personal hygiene items like toilet paper, wet wipes, toothbrushes and soap are also important.
Additionally, have a waterproof container with ID cards, insurance policies, and birth certificates. Store extra blankets or sleeping bags in the storm shelter in case the heating fails. Bring a phone charger or power bank to stay connected with loved ones if the electricity is gone.
Be prepared! Test your storm shelter to make sure it’s safe for hurricanes or at least for that messy closet.
Testing and Maintaining Your Storm Shelter

To ensure the optimum functionality of your storm shelter, proper testing and maintenance are essential. Follow this 6-step guide to guarantee its effectiveness:
- Inspect the structure: Regularly examine the walls, roof, and foundation of your storm shelter for any signs of damage or wear and tear.
- Test the door and locks: Verify that the door is fully functional, opening and closing smoothly. Check the locks to ensure they secure the shelter tightly.
- Assess ventilation systems: Make sure all vents and air circulation systems are clean and free from obstruction, allowing fresh air to flow comfortably.
- Check emergency supplies: Regularly review and update your emergency supplies, including food, water, first aid kits, and any necessary medications.
- Monitor electrical systems: Inspect electrical components such as lights and backup power sources to ensure they are in proper working order.
- Practice emergency drills: Regularly conduct drills with your family or household members to ensure everyone knows how to properly use the shelter and its features.
Furthermore, it is crucial to remember that each storm shelter is unique, and additional maintenance requirements may exist based on its specific design and location. Consult the manufacturer’s guidelines or seek professional advice to address any specific needs your shelter may have.
Finally, don’t delay in testing and maintaining your storm shelter. By taking these measures, you can have peace of mind knowing that your shelter is ready to provide you and your loved ones with the utmost protection during severe weather events.
Remember, it’s not just your exes that need regular inspections and repairs, your storm shelter does too.
Conducting Regular Inspections and Repairs
Regular inspections and repairs are key for keeping your storm shelter in good condition. By carrying out these tasks frequently, you can guarantee that your shelter stays safe during extreme weather.
Here’s a four-step guide to help you effectively conduct regular inspections and repairs:
- Exterior Examination: Start by examining the exterior of your storm shelter. Look for any signs of damage, such as cracks or leaks. Pay attention to the walls, roof, and door. If you see any issues, make a note of them for repair.
- Interior Examining: Move on to inspecting the inside of the shelter. Look for any structural damage or wear and tear. Make sure all vents, windows, and doors are working properly. Don’t forget to check the floor for any signs of deterioration.
- Functional Checking: Test all the functional parts of your storm shelter. This includes checking the lighting, ventilation system, emergency supplies, and communication devices, if applicable. Replace or fix anything that isn’t functioning correctly.
- Specialist Help: It’s recommended to have a professional inspect your storm shelter at least once a year. They have the know-how to spot even small damages that you may miss. Their assessment can help stop potential problems in the future.
Also, it’s important to keep records of all maintenance activities done on your storm shelter. This can act as a reference point for future assessments and give valuable information about its overall condition.

Pro Tip: Regularly cleaning and organizing your storm shelter can help it last longer and work better over time.
By following these instructions and taking proactive measures in keeping your storm shelter’s quality, you can make sure you and your family stay safe during extreme weather. Plus, teach your family how to use the storm shelter – because seeing them panic and try to figure it out during a real storm isn’t fun!
Educating Family Members on How to Use the Shelter and Survive The Storms
Educating family members on storm shelter use is vital for their security during extreme weather. Here’s a 3-step guide:
- Teach the basics:
- Explain the shelter’s location and how to get to it fast.
- Show them how to close the entrance and why it must stay shut during storms.
- Introduce emergency supplies:
- Instruct family members what items to keep in the shelter, like food, water, blankets, a first aid kit, and any needed medicine.
- Demonstrate the best way to store supplies.
- Do evacuation drills:
- Do drills often to ensure everyone knows what to do in an emergency.
- Guide them through each step from current location to shelter.
- Stress staying calm and following instructions during drills.
Also, address special details related to your shelter or circumstances, like any special features or needs.
Pro Tip: Assign each family member a role and responsibilities for emergency use. This will speed up the process and guarantee a quick response when time counts.
Remember, like a good relationship, a good shelter needs regular check-ups to stay strong.
Conclusion
After a natural disaster, the safety of you and your family is key. It is important to build a storm shelter in your closet for protection from high winds and debris. To create a secure space, follow these steps:
- Size and locate your closet.
- Clear out unnecessary items.
- Strengthen walls and ceiling with plywood or metal.
- Add support beams for integrity.
- Install a heavy-duty door with locks.
- Seal gaps around the door.
- Ventilation: install an air vent near the top of a wall. Reinforce it with mesh screens or bars.
- Stock the shelter with emergency supplies – non-perishable food, water, flashlights, batteries, and a first aid kit.
- Store supplies in waterproof containers.
- Inspect and maintain the shelter periodically.
With a safe haven within reach, you can rest easier in times of crisis. Stay proactive and invest time into building your storm shelter.